All that glitters…
I’m a big fan of sparkly cakes. Wait, let me start over. I’m a big fan of sparkly everything! When Molly (ISAC’s most famous customer service specialist) suggestion writing a blog on edible sequins, I was totally on board! I started by talking to Chef Nicholas about the methods he shares with his students, searched Craftsy classes, and finally researched methods online. I have quite a bit to share with you, so let’s get started!!
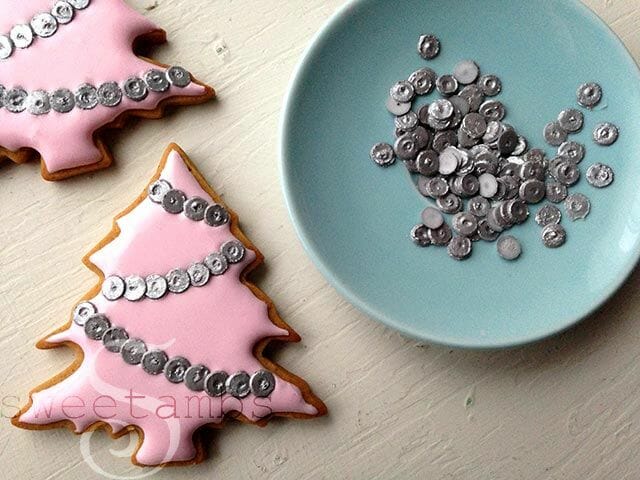
First, let’s discuss Chef Nicholas’ method. You will need piping gel, confetti sprinkles or sugar crystals, gold or silver edible paint or airbrush sheen, and of course a cake! Chef Nicholas suggests coloring the fondant on your cake the same color (or a similar color) to whatever color you would like your finished sequins to be. For example, if you want a gold sequins cake, start with a cake colored in golden yellow fondant or grey fondant for silver sequins. You could also paint or airbrush the fondant to match exactly. Next, you will use cover the cake in piping gel, take a handful of your confetti sprinkles or sugar crystals and press them on from the bottom up. You may need to work in sections so the piping gel doesn’t dry too fast. Once the cake is completely covered in your sequins, paint or airbrush in gold or silver (or whichever color you’d like!). BAM- SEQUINS CAKE! This is the method that Chef Nicholas teaches his students at the French Pastry School; in fact, several of our facebook and instagram followers have seen these cakes and have asked how the look was achieved.
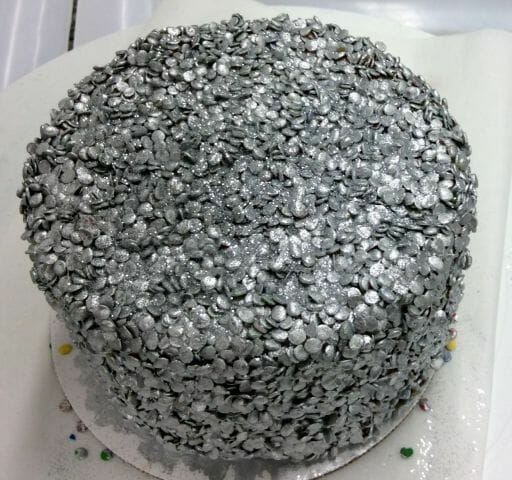
Silver sequins cake with confetti sprinkles.
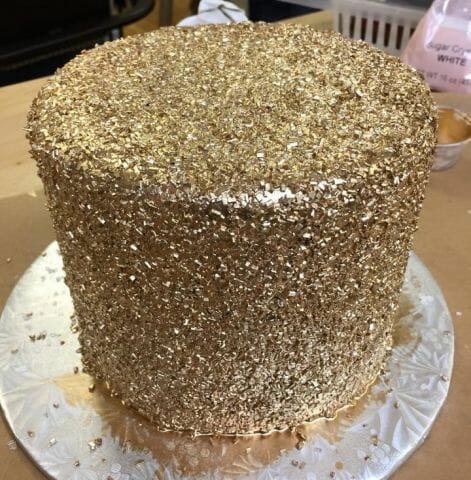
Sugar crystal sequins
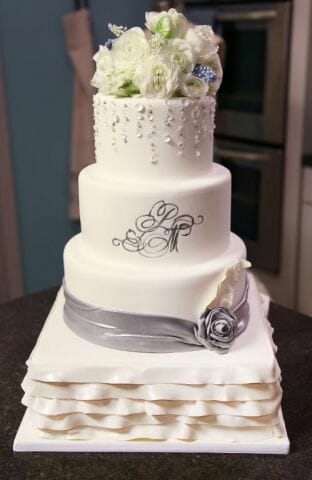
You can see the same basic method in Erin Gardner’s Craftsy class Cakes in Full Bloom (covered in lesson 5). If you are a visual learner, and not one of Chef Nicholas’ French Pastry School students, then check out Erin’s class. If you click the class name above, you can get the class for a special price! An alternative option that Chef Nicholas suggested was using the Claire Bowman Sequins Cake Lace Mat (and yes we carry it at ISAC). You can create perfectly molded sequins with the mat and Cake Lace! This mat will create beautifully sophisticated sequins that look stunning on wedding cakes.
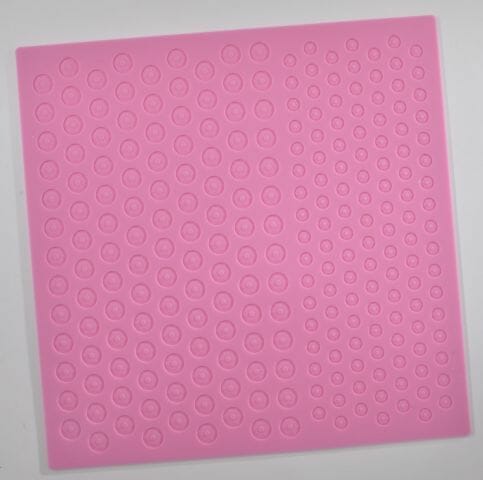

Sequins made with Cake Lace Sequin Mat. Photo: Cakelace.co.uk
If you are a royal icing fan, then I would suggest trying Amber Spiegel’s (Craftsy instructor and host of the popular blog Sweetambs.com) method. Amber began making her edible sequins by creating a small circle stencil by using a sheet of acetate and a hole punch. Then she uses stiff royal icing to spread over the stencil onto wax paper. After peeling away the stencil, Amber repeats the process until the entire wax paper sheet is covered in tiny royal icing circles. She than uses the wrong end of a small paint brush to create a small indention in the center of each circle. After allowing the sequins to completely dry, Amber painted them with a mixture of luster dust and alcohol. Finally, she used a small offset spatula to carefully remove the sequins from the wax paper! Voila, another spectacular sequin method for you to try out!! See the full tutorial here. Thank you, Amber, for allowing me to share you method on our blog this week!
Royal icing sequins. Photo: Amber Spiegel, Sweetambs.com
Craftsy has a few other options for all of your edible sequins needs. Let’s start with Rachael Tuefel’s class, Cake Design Made Simple: The Wedding Dress. In lesson three of this class, Rachael shares her method for making sequins with gumpaste. She beings by using a pasta attachment on her mixer to get her gumpaste so thin that she can read through it! When it is nice and thin, Rachael uses round piping tips in a variety of sizes to cut out her sequins! After she cuts all the sequins that she needs, Rachael uses a large straight pin to push a hole through the center. Once the little sequins are dry, she dusts them with luster dust or luster dust mixed with a bit of alcohol. That’s it, seriously. So easy and quick!
Rachael’s sequins can be seen on the top teir of this cake from her class. Photo: Craftsy.com
Marina Sousa, one of Chef Nicholas’ dearest friends, shares several of her own sequins techniques. The first is very similar to Rachael’s method, with a few notable differences. Using fondant, Marina uses a pasta attachment to get the fondant very thin. Next she dusts the fondant with luster dust, and cuts out sequins using round punch cutters, piping tips, AND even the Polka Dots Patchwork Cutter (and gives a shot out to Chef Nicholas for developing his Patchwork Cutter Mat!). I think all of these techniques are easy, straightforward, and look really fabulous on the cake Marina designs. BUT, Marina doesn’t stop there. Nope, no sir. She kicks it into high gear and uses gelatin to create really lifelike, reflective, shimmery sequins. Marina takes you through the whole process of blooming, heating, clarifying, and coloring the gelatin. Once the gelatin is prepared Marina spreads it thinly onto acetate sheets with various textures (which help the finished product look extra sparkly). Once the gelatin sheets are completely dry, Marina creates a sequin assembly line utilizing different sized hole punches! So, Marina shares fondant sequins (showcasing multiple methods), and gelatin sequins that couldn’t be easier. If that isn’t enough Marina Sousa sequins for you, she also demonstrates how to make a custom sequin border mold!!! I mean, come on- this woman may be the sequins queen!!! All of Marina’s sequin secrets can be found in her Designer Fondant Textures class. Oh, and as an added bonus, there is a mini tutorial on the Craftsy Blog! You can see a quick video on how Marina creates her gelatin sequins FOR FREE!!! Nothing beats freebies! Thanks Marina and Craftsy!
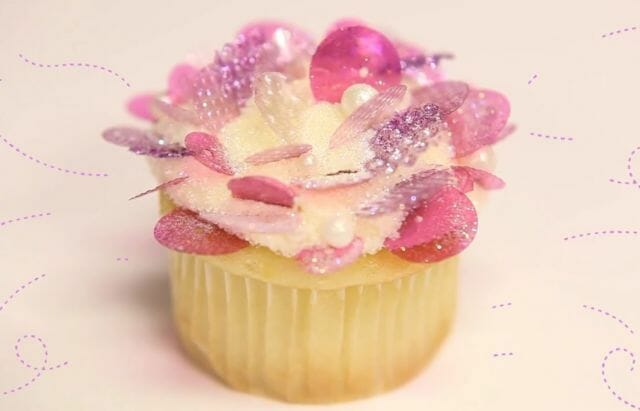
Marina’s gelatin sequins! Photo: Craftsy.com
Well, there you have it folks six different (and really pretty easy) ways to create amazing edible sequins for your beautiful cakes! I’d love to know how many of you have made edible sequins, and have you used one of the methods I have discussed here or do you have another method to share?! I love reading your comments, so please share!
Sweetly yours,
Stephanie
Don’t just follow our blog! Follow Chef Lodge on Facebook, Instagram, Pinterest, Twitter, Flickr, and Tumblr!

Winner of the 2015 Craftsy Blogger Award for Best Craftsy Cake Decorating Instructor Blog


Thanks, Stephanie! I’ve tried Marina’s methods, and the others are definitely worth the time to explore!
Stephanie,
I experimented with the different methods described in the blog a while back, and they work great. But I did try something that was a quick method that produced sequins that weren’t as pretty as Marina’s but would still work for the right application.
I took a sheet of gelatin from a pack I bought at ISAC, spray painted with some Wilton gold (also from ISAC) on both sides, let dry and hole punched. I thought perhaps the spray would dissolve the gelatin sheet, but it didn’t. It did curl some, but that was about it. Marina’s version creates the transparent look and this doesn’t, though. But this method might come in handy for a quick fix!
Teresa- Thanks for sharing your method! I love it and hope other try it out too! I know I will be.